Guide to install Arch Linux
I finally divorced Windows soon after I fell in love with Linux. Ubuntu was my first love. I met her on Distrowatch. But she spoke no English. So I spent hours gawking at her sleaky terminal trying to learn her language, bash.
Soon I flirted with others; Mint came but reminded me of my ex, Fedora had a different yum, BSD couldn't agree on my license, Debian was old schooled. Few months ago, I discovered grey hair on my head and decided to settle down. So I started looking for someone who was simple yet was elegant. Little did I know that I would stumble upon Arch Linux.
Dating Arch is a different game. She is not just another click-next-install Linux. Like any good relationship, it needs time. So you need to undertand bricks & bolts of Linux system. Well it turns out, learning Arch is much simpler than building a house in LEGO.
Step 1 : Find the base
Through out this guide, I'll keep our LEGO analogy. At the end we'll have a working house i.e. Arch Linux. But before we begin installing Arch, we need to decide our base.
Loosely speaking, Base is a box on which the Arch Linux will be installed. There are multiple candidates for the base
- Whole system
- Dual Boot
- Hypervisor
Whole System : Choose this if you want to remain faithful to only Arch Linux. This would wipe off any other operating system you have on your computer. Though Arch is great, however some your fancy hardware may not find their drivers. If you like games, probably you also occassionally need to talk to Windows.
Dual Boot : Choose this if you want the best of both worlds. You can install Arch Linux along side your legacy operating system. However this requires little effort in trying to keep both operating system together. You need to manually partition physical file system and edit the boot loader.
Hypervisor : Choose this if you dont want to physically partition your memory. It lets you create an abstraction layer where you could virtually run mutliple operating systems. Also if you're beginning to learn Arch Linux, I would recommend you to proceed with this method.
Step 2 : Plan your house
Next step in our LEGO design, require us to plan our house. For Arch Linux, we need to prepare our system before installing Arch it.
I'm assuming that you have createa a bootable medium (CD or usb) for Arch Linux. If you are on a Unix like system, you can type
$ sudo dd if=/path/to/arch.iso of=/dev/sdX bs=4m && sync
If you are using Windows, you can find many bootable software like Unetbootin.
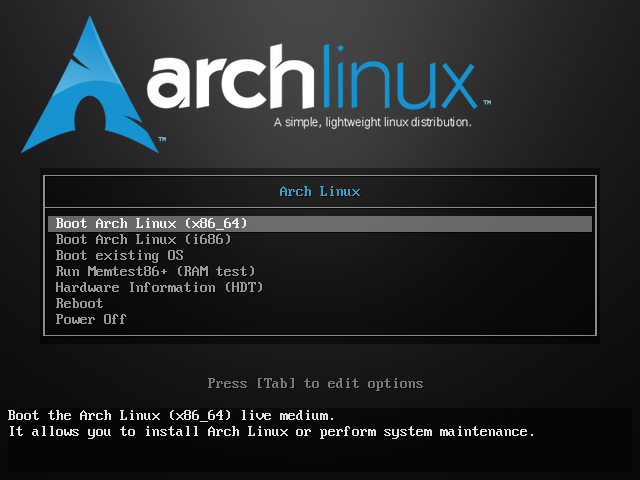
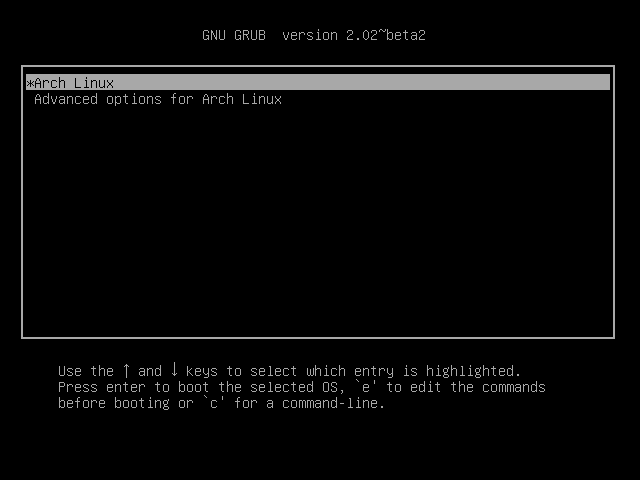
Next you need to plug in your bootable medium & select your computer to boot from that instead of your default boot medium. After successful booting, you will be greeted with a bluish black screen with multiple options. I'll proceed with the first option which loads a 64 bits Arch Linux.
Check all the available sysfs filesystem on the system. We only have one primary hard drive /dev/sda.
# lsblk

Next we need to partition the filesystem. I'll divide the filesystem into following
1.BIOS Partition : This is the partition for BIOS grub. We set "bios_grub" flag on.
2.Boot Partition : This is the partition for virtual "boot loader".
3.Swap Partition : (Optional) This is used for computer to free use extra space, when computer with lots of applications running can free some RAM.
4.Root Partition : This is the partition that serves as the highest level of your computer’s file system
5.Home Partition : This is the partition where rest of your files and personal settings will live.
Each partition information is stored in "partition table". There are 2 main formats in use: the classic Master Boot Record, and the modern GUID Partition Table. I'll be using GPT partition table which is an improved version that does away with several limitations of MBR style.
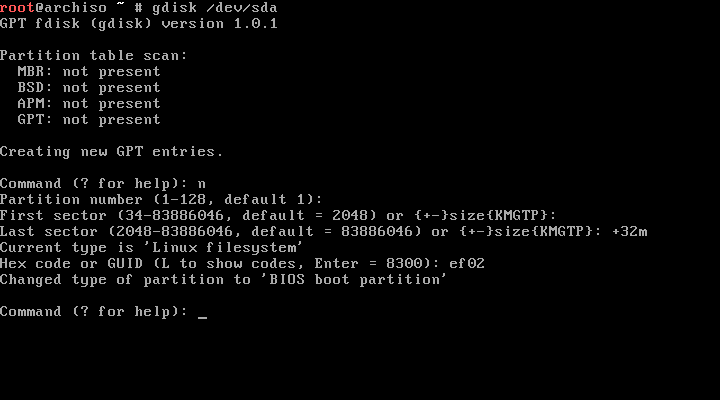
To use GPT partition, type
# gdisk /dev/sda

To create five partion, follow five parts
Create Partition ONE
-
Type ‘n’ at the prompt and hit 'Return'.
-
When it asks for a partition number, hit ‘Return’ to accept the default (1).
-
When it asks for a “first sector”, hit 'Return' to accept the default. This will start the partition at the beginning of your virtual hard disk.
-
When it asks for a “last sector”, type '+32m'. This will create 32 megabytes in size, which is used for BIOS grub.
-
When it asks for a "hex code", type 'EF02' and hit 'Return'
Create Partition Two
-
Type ‘n’ at the prompt and hit 'Return'.
-
When it asks for a partition number, hit ‘Return’ to accept the default (1).
-
When it asks for a “first sector”, hit 'Return' to accept the default. This will start the partition at the beginning of your virtual hard disk.
-
When it asks for a “last sector”, type '+1g'. This will create 1 gigabytes in size, which is used for bootloader partition.
-
When it asks for a "hex code", type '8300' and hit 'Return'
Create Partition Three
-
Type ‘n’ at the prompt and hit 'Return'.
-
When it asks for a partition number, hit ‘Return’ to accept the default (1).
-
When it asks for a “first sector”, hit 'Return' to accept the default. This will start the partition at the beginning of your virtual hard disk.
-
When it asks for a “last sector”, type '+2g'. This will create 2 gigabytes in size, which is used for swap partition.
-
When it asks for a "hex code", type '8200' and hit 'Return'
Create Partition Four
-
Type ‘n’ at the prompt and hit 'Return'.
-
When it asks for a partition number, hit ‘Return’ to accept the default (1).
-
When it asks for a “first sector”, hit 'Return' to accept the default. This will start the partition at the beginning of your virtual hard disk.
-
When it asks for a “last sector”, type '+15g'. This will create 15 gigabytes in size, which is used for root partition.
-
When it asks for a "hex code", type '8300' and hit 'Return'
Create Partition Five
-
Type ‘n’ at the prompt and hit 'Return'.
-
When it asks for a partition number, hit ‘Return’ to accept the default (1).
-
When it asks for a “first sector”, hit 'Return' to accept the default. This will start the partition at the beginning of your virtual hard disk.
-
When it asks for a “last sector”, hit 'Return'. This will allocate remaining size, which is used for home partition.
-
When it asks for a "hex code", type '8300' and hit 'Return'
Write to Partition
-
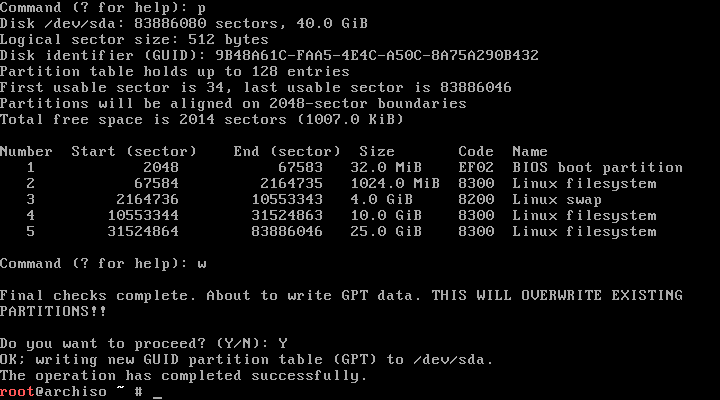
Type 'p' to see all the partition
-
Type 'w' to save the partition to the filesystem.
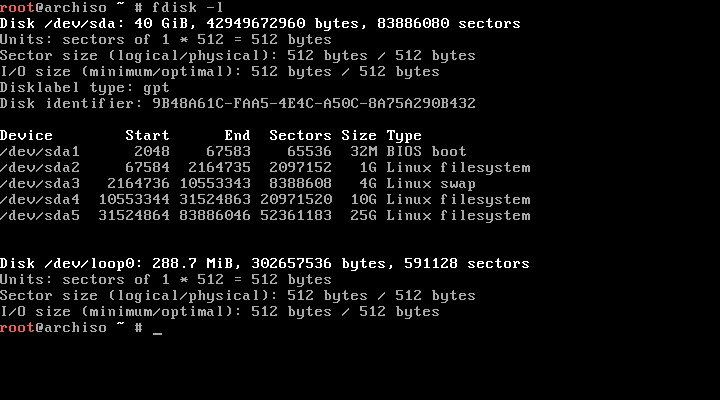
You can also see your final filesystem, by typing
# fdisk -l
Next we need to format our partitons before we install Arch Linux. However don't format the first partition i.e. /dev/sda1.
# mkfs -t ext4 /dev/sda2

# mkfs -t ext4 /dev/sda4

# mkfs -t ext4 /dev/sda5
Also format the swap space and switch it on.
# mkswap /dev/sda3

# swapon /dev/sda3
Step 3 : Build the walls
We are very close to building our house in Lego Arch Linux. We need to start building our walls system.
Linux follows the root hierarchy. So we need to mount the root partition first i.e. /dev/sda4.
# mount /dev/sda4 /mnt

# cd /mnt
Next we need to mount partition for bootloader and home on root partition.
# mkdir boot home

# mount /dev/sda2 boot

# mount /dev/sda5 home
Now we are ready to install Arch Linux on our system. Type the following command and sit back for few minutes before everything is loaded
# pacstrap /mnt base base-devel
After this we need to install bootloader. When a computer loads up, it needs bootloader to find and load an operating system. There are many bootloaders to install like syslinux, grub, LILO, etc but we'll be using GRUB for this guide.
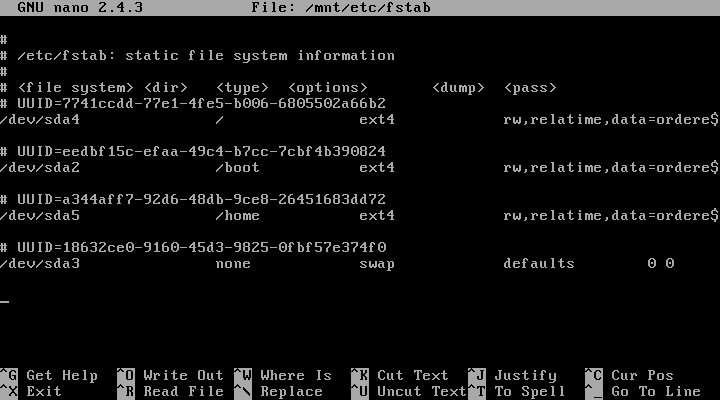
Local and remote filesystem mounts a special file /etc/fstab which contains instructions on starting up all your Linux system’s various partitions. To generate fstab file type
#  genfstab -p /mnt >> /mnt/etc/fstab
#  nano /mnt/etc/fstab
Step 4 : Add a roof
You can't live in your Lego home before you add a roof. Similarly you can't reboot your system now before you initialize your Boot Loader.
Install Grub on non-efi system
# pacstrap /mnt grub
Next you need to login to your system without rebooting. Type
# arch-chroot /mnt /bin/bash
# grub-install --no-floppy /dev/sda

Lastly, generate the configuration file for the grub.
# grub-mkconfig -o /boot/grub/grub.cfg
Note: If you are dual booting on efi system, installing grub would be slightly different. You could follow this blog
Now you could easily reboot your system. However it's advised that you follow the last step to make it more usable.
Step 5 : Add final touches
We have built our little home, Arch Linux. However we need more than a blank terminal to stare at.
First we’ll edit /etc/locale.gen. type
# nano /etc/locale.gen
And uncomment the following two lines by removing the # from the front
en_US.UTF-8 UTF-8
en_US ISO-8859-1
Generate the updated file by typing
# locale.gen
Change the hostname and enter the hostname
# nano /etc/hostname
Change the time zone to your location
# ln -s /usr/share/zoneinfo/America/New\_York /etc/localtime
We need to tell the computer to connect to the internet. We need to run the following command
# dhcpcd
To permanently make this changes, type
# systemctl enable dhcpcd
You dont want to forever live with the terminal. Legacy operating system usually come preinstalled with Windowing Environment. For Unix like OS we need to install Window Manger to manage graphical user interface. X11 is a windowing protocol which provides basic user interface. To install X11, type
# sudo pacman -S xorg-twm xorg-xclock xterm
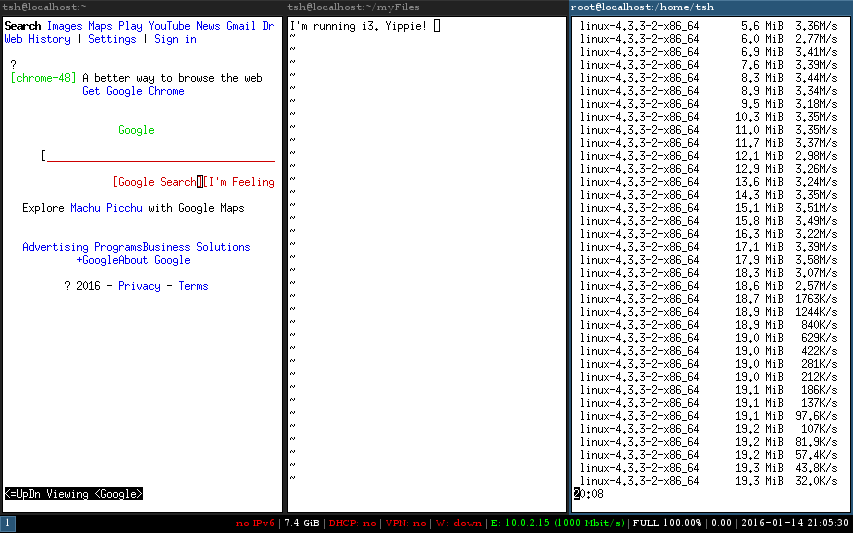
Well we also need to install a destop environment. Destop environment uses X11 to provide better user interface. Popular examples are GNOME, KDE, etc. I like tiling window environment which is suited for people who like tinkering & since you're installing Arch Linux, I reckon i3 would appeal to you. To install i3, type
# sudo pacman -S i3
Now, once you have .i3 installed, just go to your ~/.xinitrc and add:
exec i3
Customize GTK
$ sudo pacman -S lxappearance
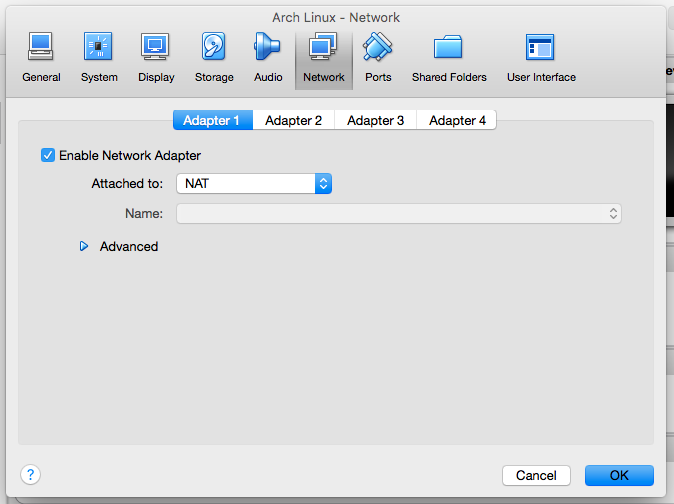
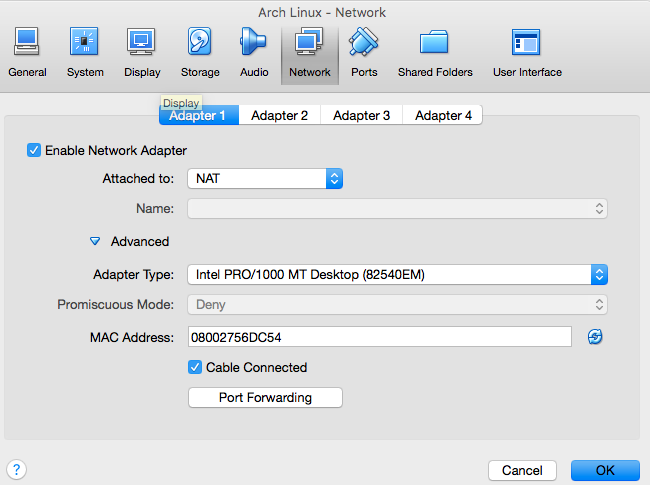
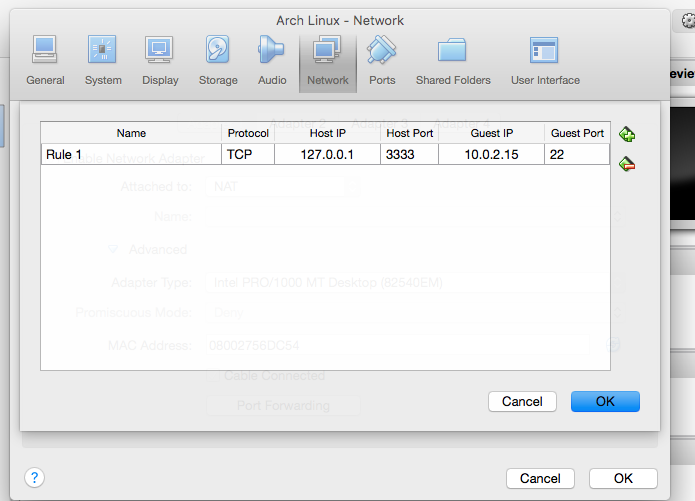
Sometimes we need to ssh into the virtual box. First select your virtual machine & click Settings->Network->Advanced->Port Forwarding
Now we need to login into virtual box, & install openssh
$ sudo pacman -S openssh
Generate your ssh-key
$ ssh-keygen
Start ssh daemon at the login time
$ sudo systemctl enable sshd.socket
Finally on your Host computer, type
$ ssh -p 3333 username@127.0.0.1
And finally :)
# reboot
Step 6 : Play with your house
To start the Window Enviroment, type
$ startx
comments powered by Disqus